Galleries

  • Covered Bridges of Chester County – Phase 1 – DONE

    Covered Bridges of Chester County – Phase 1 – DONE

    After many hours of work on this project, I am happy to announce that I have completed the First Phase of this project!

    Back in October of 2009, when I took my first pictures of Bartram’s Cover Bridge in Newtown Square…

    I knew I liked covered bridges…
    the look…
    the history…
    the engineering…

    I had no idea that it would become this obsession!

    Than, almost a year, to the day, I completed my Chester County Covered Bridge captures.

    Generally, I posted them to Flickr, and would then add the images to my blog.

    Blogs ago…

    Initially, my website was based on DotNetNuke, but as I got into blogging more, the blogging options within DNN, were just not worth the cost.

    For a while I was using the DotNetNuke blog module, but on two separate occasions, while doing some maintenance work in the background, my blog blew up.

    Needless to say my productivity was very low during this time.

    I did learn a lot about.net nuke during that time, but the direction I was moving, was not going to allow me to thoroughly investigate all the functionality of DotNetNuke.

    A little over a month ago, I decided to start from scratch again.

    But this time in a totally WordPress environment.

    Thankfully, I had most of my blog entries already in basic HTML format, so it was just a couple of nights of copying and pasting. I did have to redo some CSS coding, but that turned out to be fundamentally better for the overall look and feel of my website.

    You might call this an evolution in my thinking of how to create maintain and operate a website.

    Be that as it may, I have learned a lot, and with the coding gods help, my site will stay up and running for a long time.

    The Journey…

    As for Phase One of my Covered Bridge project, during the journey, the effort seems to have paid off more than the actual goal.

    During the adventure, I was able to find great websites that pointed me in the directions of the bridges.

    I used Google Earth and maps, to plot my coordinates into Maggie’s GPS, and I was off and running.

    Having lived in Chester County for over 30 years, I thought I knew the area fairly well, but nothing prepared me for the beauty that seems to be uniquely Chester County’s.

    It is very hard to believe that one can drive down a major road such as Route 30, turn left or right, travel for about 5 to 10 miles, make another left or right, and then be bombarded with the beauty of rolling fields of corn, hay or tobacco, and in between the fields, beautiful barns and silos of all colors, and of course the Covered Bridges.

    I was also amazed that most of the bridges were in good condition, especially in these economic times.

    Of course the more heavily traveled bridges such as Rapps and Knox-Valley Forge need a little work, but it is mostly cosmetic, i.e. a couple of nails and a good paint nails job, but who am I to say…

    The Photography…

    This project was also my first real exploration into the realm of HDR photographic techniques.

    I knew the basic concepts behind HDR from my work using Ansel Adams’ Zone System in my black and white work.

    What was really new to me, was the software side.

    In the past, I had tried to create HDR images with Adobe Photoshop CS3, but the scripts always crashed the application, no matter how many times I had tried.

    Using Google, I was able to hunt down many HDR software packages, and from there, I started to explore.

    The Software…

    The basic thing that I learned in using the various software packages that I found, was that it comes down to personal taste.

    All the software applications that I used, allowed for some form of tone mapping, but the way you interact with the tone mapping controls, varies in some cases, significantly from one app to the next.

    Another consideration, is what type of file format is used to bring the original captures into the software application.

    Picturenaut (HDRlabs.com)

    The first application that I used, Picturenaut, is donation-ware, which was a big plus at the start.

    The biggest obstacle that I had initially, was converting my DNG files over to TIFF, but within Adobe Lightroom I was able to easily set up an Export function to do the dirty work.

    Once you are inside the application, it is just a matter of importing your series of images, the interface is a little bleak but I did like the fact that you had some additional tweaking features before import, such as EV settings editing.

    There are a series of presets and I believe you can download more from the site.

    I did have some problems with saving my files with a new name, but got around that by using the default name provided.

    Even this renaming of files became a checkpoint for bringing that file back into my work-flow, but that is another subject.

    I have seen the debates in regards to working with TIFF vs. DNG, and at the moment, I prefer to work with DNGs, namely because they cannot be edited directly, thereby taking on a template form for any future use.

    Any actions you take on a DNG file, whether it be in Adobe Lightroom – which only modifies the metadata, or Adobe Photoshop – which will only let you do a “Save As”, your original image data is not touched or altered, either by accident or on purpose.

    Needless to say this is a big plus.

    Photoshop CS5 (Adobe.com)

    The reviews that I was reading on Photoshop CS5, seem to suggest that it was a good contender for dealing with HDR captures.

    I had to maneuver some things and was finally able to set up a VM so that I could give Photoshop a test drive.

    Once I got the VM up and running, I realized that I was going to have some issues with speed. Needless to say if you do run Photoshop, running it in the VM is not optimal, but serves my purpose at the moment.

    I was very happy to see that when I tried to import my DNG files, CS5 brought them in without issue and did not crash!

    Another thing that I really enjoyed, was the ability to select your “key-frame” for your HDR rendering.

    Photomatix (HDRsoft.com)

    After working with Picturenaut and Photoshop, I decided to finally give Photomatix a try, which I have already reviewed.

    In quick, I was very impressed with its speed, but it was very easy to see why, so many have indulged in the surrealistic side of the HDR spectrum.

    HDR Efex Pro (NikSoftware.com)

    after watching several of the online videos, after watching several of the online videos, I signed up for a 15 day demo.

    It took several days to get the license number, but once I did I fired up the demo in my VM.

    I should have taken the extra time to read the requirements… you definitely do not want to run this on a VM.

    You are running an application on top of Photoshop CS5, hence the need for very powerful machine with a lot of RAM and a very good video card.

    Of all the applications I played with, this one looks like the most fun, but I was not able to really use the application in my VM environment, it was just too slow.

    Which do I use?

    As mentioned earlier in this posting, it seems to come down to personal choice but more importantly, how much are you willing to spend.

    Picturenaut is the only Free one in the group. It is definitely very powerful but the user interface seems to be a little bit more technical.

    Photomatix runs between $99-$129, depending if you want the plug-in or not. It seems to have the largest user base at the moment, and is very well regarded.

    Photoshop CS5 has definitely revamped it’s HDR thinking, but carries a heavy basic price, $199-$999.

    HDR Efex Pro definitely seems to be the premier environment for working with HDR at the moment, but it also comes at a very premium price, $159.95, on top of the need of Photoshop, and good hardware.

    So take your pick, they are all going to do more or less the same thing, it is up to the artist to figure out which tools are the best for them, just remember some of the most beautiful and lasting things have been built with the simplest of tools.

    Just remember to have fun, while you are learning.

    New Friends and Contacts

    A basic foundation of this project, has been Flickr.com.

    I joined Flickr in September of 2009, but did not do much with it until July of 2010, it which point I upgraded to a Pro membership, and that’s when things to begin to change.

    As my images got invited to various Flickr groups, my contacts begin to grow.

    I started with some local groups, then began to find specific groups for my interests, including Covered Bridges.

    During this time, I received a great deal of feedback and comments that encourage me to continue on.

    So thank you all for visiting my various sites and incarnations…

    I thank you one and all!
    – Andrew
    § § § § §
    [adrotate banner=”1″]
  • Why the move to WordPress (self-hosted)?

    After working with the DotNetNuke Content Management System (CMS) for over two years on my personal and several other websites, I finally made the decision to move to something a little less daunting.

    Do not get me wrong, DNN is a very powerful system, but with the power comes complexity.

    I needed something that did not require as much time to work with, so I started to look into WordPress.

    I also realize, that the two systems are entirely different, and have two different audiences in mind.

    DotNetNuke can be managed by one person, but that one person needs to be aware of several different underlying architectural environments. Having a programming background is also very desirable when tweaking in needed.

    WordPress on the other hand, seems to be geared more for the casual user. Once set up, management of the software appears to be far easier than DotNetNuke.

    In the following, I will attempt to do some illustrations in regards to the pros and cons DotNetNuke and WordPress.

    By no means is this list comprehensive, but is based on over two years of working with DotNetNuke, and new installation of WordPress, as my new website environment. (I did run a WordPress.com (Free) site for approximately same amount of time… and I have a couple alter ego sites on WordPress…)

    DotNetNuke

    Pros

    • Free/Open Source
    • Very Powerful and Scalable
    • Supports many Microsoft development languages
    • SEO Friendly (w/Plug-Ins)

    Cons

    • Complex
    • Windows Only
    • Requires Hosting Server
    • Simple Back-ups can be done w/Additional “Paid” Software
      – Depending on your Hosting company, Database backups may require additional purchased software.

    DotNetNuke it is definitely geared towards an environment where there is someone or some folks that are willing to administer an environment where multiple technologies may be involved.

    DotNetNuke is infinitely expandable with the various programming languages that are available to create modules and enhancements within this Content Management System (CMS).

    When looking at the DotNetNuke homepage, you can see that many large corporations throughout the world use this CMS for their websites.

    There is also a large development and support environment available for those that wish to use DotNetNuke, including SnowCovered.com, DNNCreative.com and the forums on the Main DotNetNuke website.

    One of the things that I found very depressing about the DotNetNuke environment, was that every time I wanted to have additional functionality and something, it is it was either a great deal of work, or I had to pay for it.

    I always felt that I was getting “Nickel and Dimed” for everything I wanted to do, including documentation and training.

    A prime example of this would be the DotNetNuke blog module. Based in this day and age of blogs seems to be the quintessential format for all many websites.

    WordPress.com (Free)

    Pros

    • Free/Open Source
    • Very Powerful
    • No Hosted Needed
    • SEO Friendly

    Cons

    • Limited Enhancement options
    • No Google Analytics
    • No Google AdSense
    • Might be Block by Firewalls

    WordPress.com by far is the simplest of these three options presented, but what do you want?

    There is no need to find a host, installation is nearly instantaneous, with a few clicks you can have your theme for your website, and you’re off and running.

    With the free hosting version of WordPress, there is no advertising “things” that must be placed on your website, which I find very interesting, because I wonder how WordPress pays for itself.

    Another Post, another time….

    WordPress (Self Hosted)

    Pros

    • Free/Open Source
    • Very Powerful
    • Google AdSense & Analytics
    • Very Powerful and Scalable
    • Multiple Platforms ( Wintel & Linux)
    • Very Low Hosting Fees
    • SEO Friendly (w/Plug-Ins)
    • Basic Back-up of the MySQL can be done with Free Plug-ins

    Cons

    • Need a Hosting Server (Hosting Fees)

    Because WordPress is open source, there are no cost associated with the base software, which does lower costs as one looks around at various hosting options.

    I did research one vendor, that does have very low price, but what I found out was, the Advertised price was based upon an upfront one year obligation of hosting.

    Once again the law of averages, for the hidden truth.

    The ULTIMATE hosting environment would be comprised of Linux as a server operating system, Apache as your Web server, and MySQL doing the database backend, and the ability to use PHP scripts/language. Also known as, LAMP (or Linux, Apache, MySQL, PHP)…

    There are thousands of Hosting Vendors that could fit this description… that is beyond scope of this post to really get into that issue…

    Many of these Vendors also offer one-button installation of WordPress which for those that do not enjoy the fun of installation, one can just click… sit back and wait…

    I did not do this so I cannot comment on the validity of these installs, but if there were an issue there would be far more complaints than what I was able to see in various forums.

    Install – WordPress

    I did a fair amount of reading to make sure, that I was moving in the right direction of a WordPress install..

    I did my necessary backups of my DotNetNuke website…

    I even converted many of the aspx pages to HTML, and then integrated them to my temporary WordPress.com blog site.

    My WordPress.com site was my secondary backup, and served as my template for my new website.

    Having been a Wintel System Administrator for 10+ years, I knew I needed to back up everything…

    Several times over…

    I confirmed with my hosting company, CrystalTech.com, that my hosting environment was able to accommodate WordPress…

    I also confirmed the default structure of my hosting environment.

    This was going to be a “Bare metal” / “Fresh” install.

    I downloaded and unzipped the official WordPress installation package, and uploaded it to my webspace, and ran the installation script.

    The installation ran extremely quickly… I was VERY surprised!

    I was able to launch my website install the database etc. etc. etc. without issue…

    Now it was time to customize.

    Note – Another thing that struck me, was the fact that the administrator interface for WordPress is far easier to understand, then what one would face with DotNetNuke.

    I am not going to get to each and every detail of the various ‘things’ that one can add to their web press environment, but needless to say there are thousands of different combinations that one could create to fit their personal taste.

    Conclusion

    WordPress (Self Hosted), in my opinion, is the most flexible of the three environments presented, but this is dependent on how much you want to be involved financially or through development.

    For a Single User with some General knowledge, but not willing to deal with the test technical aspects, WordPress.com (Free), would be your best bet.

    For a User with some Advance knowledge, but not willing to deal with the test technical aspects, WordPress (Self Hosted), might be a consideration, but be aware, the technical aspect, might become addicting…

    For accompany willing to invest the time and finances, DotNetNuke can be an excellent platform to build from, they can easily grow as your requirements do.

    Additional References

    Because I installed into a mixed environment, Microsoft IIS (WinTel) and MySQL (Linux), I was confronted with several unique issues with my host that were easily resolved with numerous pre-published documents.

    As part of my website reconfiguration plan, I set up on a aseymour.com, with a HTML page, that included a metadata redirect to my WordPress.com site, so I was never really “down”, my content was always available.

    But in doing so, I choose to install into a sub-directory of my main website…

    At first, when one went to aseymour.com, there would be a quick redirect page, then to the new Main.

    I had to get around this pause…

    The Crystal Tech support folks were able to point me to the following document, which also used to redirect but at a domain level, which I hope to use, later as I look into Drupla and Joomla.

    http://codex.wordpress.org/Giving_WordPress_Its_Own_Directory

    [contentblock id=1]

  • Blog Crashed… Again!

    To say that I am upset, would be an understatement…

    I was trying to publish something for my Facebook group “Chester County (PA) Photography“…

    Wanted to add a New series of Categories using the DNN Blogger module, and bang…

    No more Blog!

    I was able to recover most of my Blog Posts, and now, slowly converting them by hand over to WordPress.

    It is going to take some time, but I have far more confidence in WordPress, than I do with the DNN Blog module.

    November 15th 2010 was the last time frame when this happened…

    and I was doing the same thing…

    What is the old idiom…

    ‘Fool me once, shame on you; fool me twice, shame on me’…

    So, at the moment, I am recovering my DNN Blog entries, and moving them to WordPress…

    I’ve had enough…

    Pardon me for my Blogs brevity in the mean time…

    Thanks in advance,

    [contentblock id=1]

  • The Rite of Passage (Uwchlan Trail)

    The Rite of Passage (Uwchlan Trail)

    Walking into the unknown...
    Walking into the unknown…

    I had just dropped off my daughter at a birthday party for one of her classmates.

    Now I had two hours free!

    Before I had left the house, I said to Logan, that when I got back, he needed to be dressed to go for a walk in the woods.

    When I got home, he was ready, so I grabbed my camera bag and tripod, hopped back in the car, and drove over to the Jones Pond area of the Uwchlan Township Park on Dowlin Forge Road.

    We parked in the little lot next to the pond, and as soon as he was out of the car, he was off toward the trail. Nothing was going to stop him. I only had time to get my camera out before he was beginning to cross the small bridge.

    At 4 1/2, Logan loves to go for walks, and it is always fun to go with him.

    While I followed him, I began to take hand-held shots of the general area, which still had a lot of snow still stuck on the trees.

    As you can see in the above picture, there was  still soft unpacked snow on the trail, and had already been split into two lanes. One for the walkers and the other for cross-county skiers.

    I explained to Logan the reason for the two trails, and asked him if he wanted to learn, to which he said yes.  (If you are a skier, the conditions were great.)

    The last of the leaves...
    The last of the leaves…

    When we got to the top of the hill, I stopped to put my camera on my tripod, and start doing some HDR captures.

    Looking back down the trail, I was setting up a shoot, when I heard a small little voice from behind me saying – “Daddy, I have to go to the bathroom!”

    Thinking the worst, I asked him to be more specific, and was happy to learn, it was going to be an easy remedy.

    I proceed to carry him a few feet off the main trail, helped him get prepared, and began his first lesson in snow scripting.

    Giggles and laughter were all I heard for the few seconds of the lesson.

    When he finished, I got him in order and he was back up the trail.

    I continued shooting, concentrating on the long shadows and contrasting sun colored leaves still to hanging to the trees.

    Several minutes later, I hear – “Daddy, I have to go to the bathroom!”

    “Do you need help??

    “No!”

    and then endless giggling…

    Some late afternoon colors
    Some late afternoon colors

    [contentblock id=1]

  • Cold Weather and Your Camera

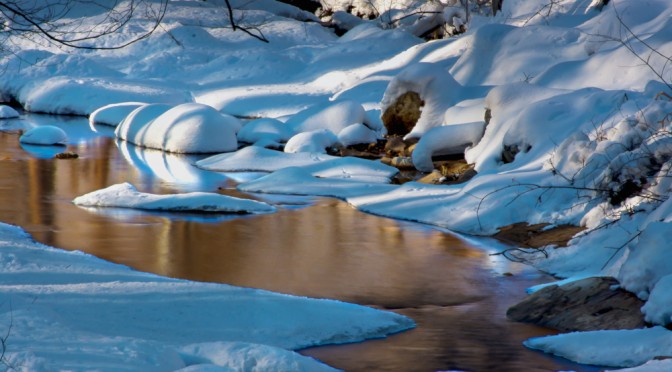
    Snow Stream hdr 13 (2011)
    Snow Stream hdr 13 (2011)

    As Chester County was getting its first real snow fall of the New Year on Thursday and Friday, I was very anxious about getting out and getting some photography in, but was thwarted with the regular activities of life: Clients, Family, Plowing, Roads, etc.

    But I was finally able to get out late yesterday afternoon, to shoot the little stream along Norwood Road heading into Downingtown, which was fairly untouched, except for a single set of tracks left by a dog and it’s owner.

    As I trudged through the snow with my camera bag and tripod, I was reminded of an earlier series of comments I made on “cold weather camera tips“, and I thought I would revisited the post to single the content and to add additional thoughts and information.

    Heading Out – Things that can slow down

    Most people when faced with shooting in cold conditions, generally only think about what cloths and boots they are going to wear to keep them warm during their photographic adventure, which is very important, but it does not stop there.

    Your camera also has moving parts that need to be included in your thinking.

    The Camera Body

    Before the advent of Digital Cameras, Traditional Film based cameras had many more moving parts that one had to be concerned with when working in cold weather.

    On Traditional Film Cameras, the Film Transport mechanism and Rollers where usually the most vulnerable as the lubricants became more viscous and in extreme case, freezing altogether.

    One also had to be careful with the film itself, because it to could be brittle, and break when being thread into the camera body.

    There was also the increase in static electrical charges, that could cause little lighting patterns on the film, especially during the rewinding process.

    With Digital Cameras, obviously there is no need to move film, so issues associated with the moving and winding film became less relevant.

    In both Film and Digital cameras, the mirror mechanism that allows one to look in to the eyepiece and then see through the lens also has the potential of slowing down as the temperature falls.

    Lens

    The blades that make up the iris diaphragm or aperture of the lens and the mechanics uses for auto focusing can also be sensitive to the cold. These features may slow down, stick together or freeze, there by not allowing the correct exposure or focus quality.

    Batteries

    As the temperature falls, the chemicals inside the batteries used to produce a current, will begin to diminish, and at some point, the camera will stop working at all.

    Ever have problems starting your Car in the winter?

    Needless to say, I keep my batteries as warm as possible, and carry an extra set.

    What to do?

    The most obvious answer is to keep your camera gear warm by simply keep it near your body for warmth, and do NOT breath heavily on the camera in an attempt to warm it up!

    This can cause condensation which is the biggest evil!

    Condensation

    As mentioned earlier, condensation, which is caused by the sudden changes in temperature, can damage your camera’s electronics.

    This usually is a cumulative issue, meaning, it might not happen on the first time, but after many sessions.

    What needs to occur, is the gradual transition of temperatures between indoors and outdoors on your camera.

    Use your camera bag as a place to help in the transition. The bag’s cushions and partitions will help to absorb the temperature extremes.

    It is also good practice to place your equipment into plastic bags as part of the transition and condensation control.

    There does seem to be a debate about keeping the camera inside your coat.

    Here you have to be sensible, and coordinate with you environment.

    Remember:

    1. You body heat is going to make for a larger extreme when you take it out
    2. Your body sweats, adding moisture to the situation

    If you have to keep your camera next to you body, use caution and common sense.

    When traveling to your destination, keep your gear in the coldest section of your car, like the back and maybe even the trunk. That way, the camera can slowly cool down. Use the reverse when heading home.

    In our house, we have a “mud room” area, that is not as warm as the rest of the house, but it is where I can acclimate the camera, before it reaches my office, which also happens to be a colder part of the house!

    Other Cold Weather Tips

    • Carry an Extra Set of Batteries
    • Remove the Batteries until needed – Warm Batteries
    • Turn off the LCD screen until needed – Battery Drain
    • Turn off the Auto Focus feature until needed – Battery Drain

    I hope you have found this posting useful, so go out an enjoy the cold weather with you camera!

    References

    – Andrew
    § § § § §
    [adrotate banner=”1″]